29mm
Priority
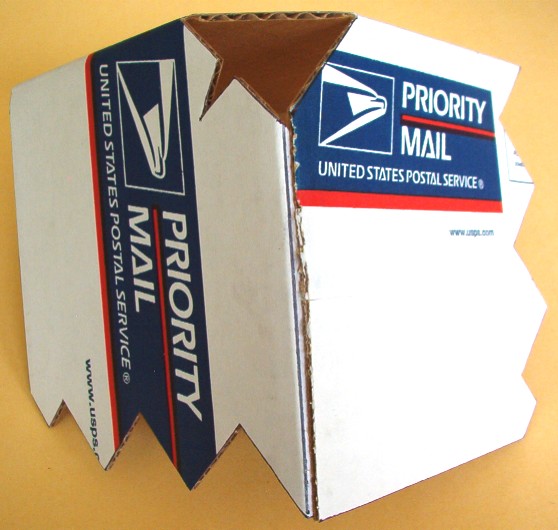
Stealth Rocket
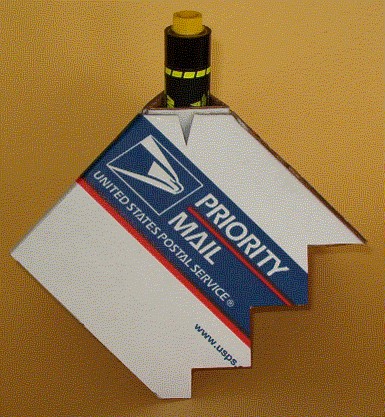 Completed rocket with an Aerotech G40-4W motor
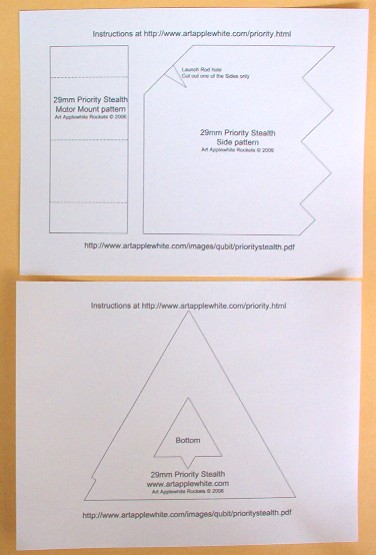
Pattern Guide (20 KB
PDF
file)
Page 2 fo the instructions
Launch Preparation instructions
Video of
Priority
Stealth on an AT F23
Elmers Glue-All is the only glue I recommend for this
rocket.
Yellow glue will not work as well because it shrinks too much
and is
visible when it dries.
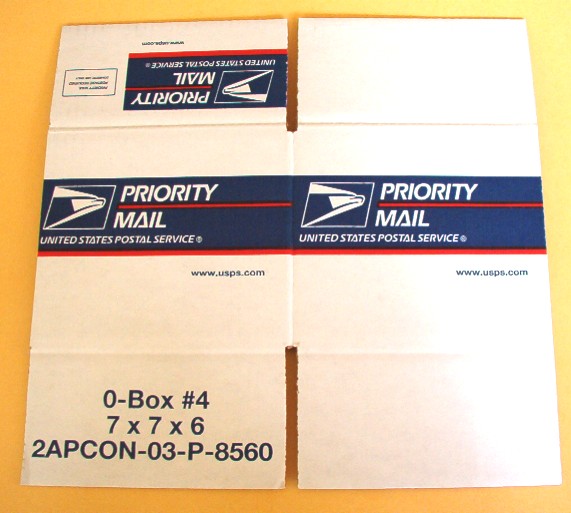
The
rocket
as shown is made from a 6" x 6" x 5" Priority Mail box which I
happen
to have laying around. You may subsititute any other
similar
corrigated cardboard box that is at least as big. This
is a
version of my Stealth
design that uses corrigated cardboard instead of
foam-backed posterboard for the main components. It
uses a very reliable autorotation (helicopter) recovery
technique for recovery. It flies straight. low and lands
close to
the
pad. It rotates on both ascent and descent. It's
maiden
flight was at NSL 2006 where it wowwed the crowd. It
flys great
on on Ellis Mountain G35 and Roadrunner G80-4 single use
motors.
Instructions
Download and print the Pattern
Guides (20KB PDF).
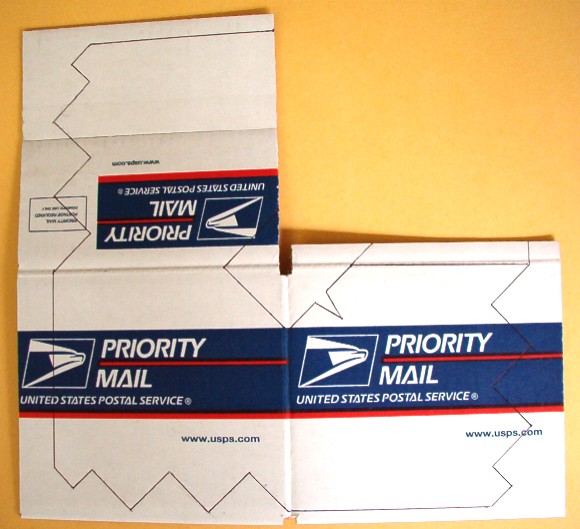
Lay the box down flat and cut just to the right of the
overlapped
seam.
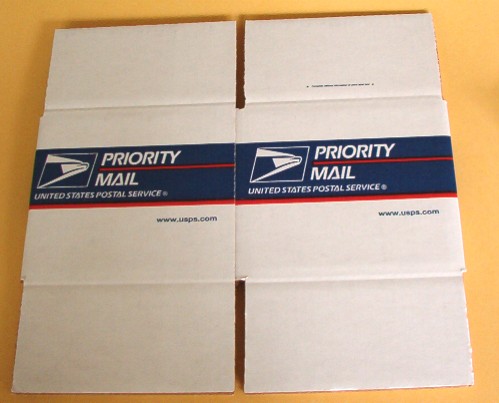
Cut the box in
half
using a metal ruler and a sharp craft knife.
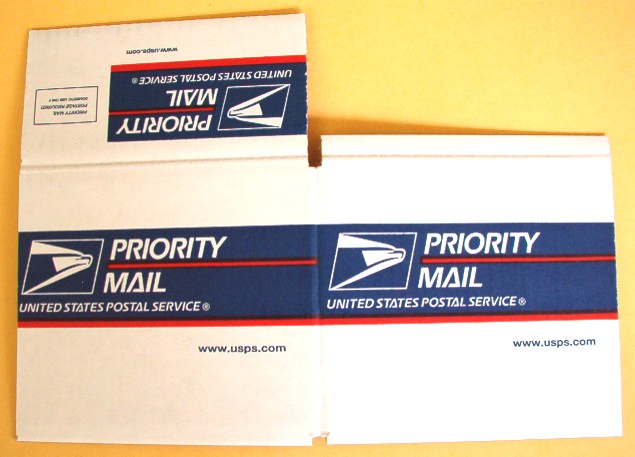
Set the right
half of
the box aside for later. Open the left half of the box and lay
it
flat.
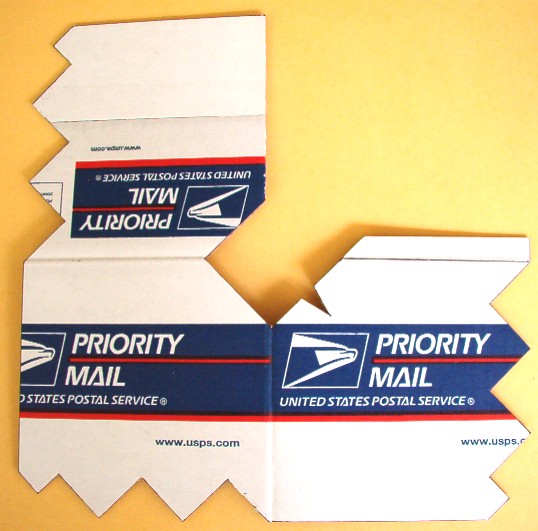
Cut the two
bottom
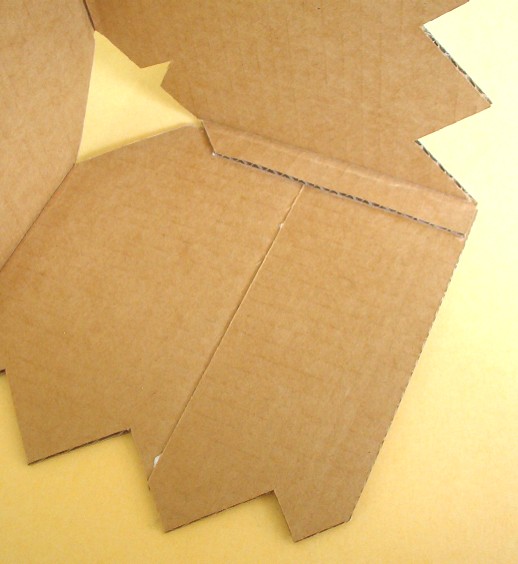
flaps off at the fold and set them aside for later. Cut
the top,
right hand flap off 1/2" above the fold.
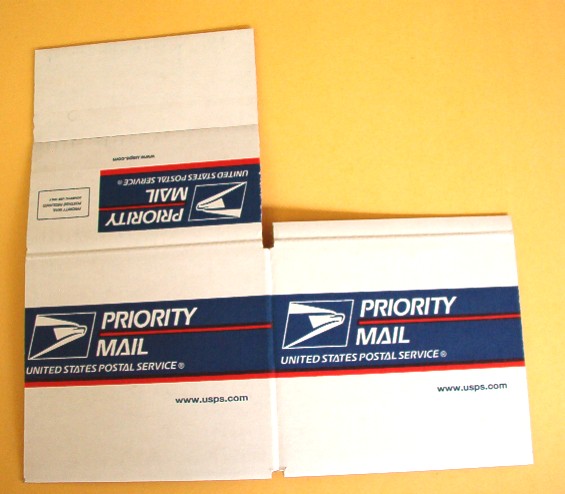
Tape one of the cut off flaps to the upper
left hand flap. 1 inch wide clear packing tape works best
for
this and is nearly invisible. Make sure the edges of the
flaps
line up and the tape is
centered, run the tape the full width of the flap and make sure
the
seam is flat.
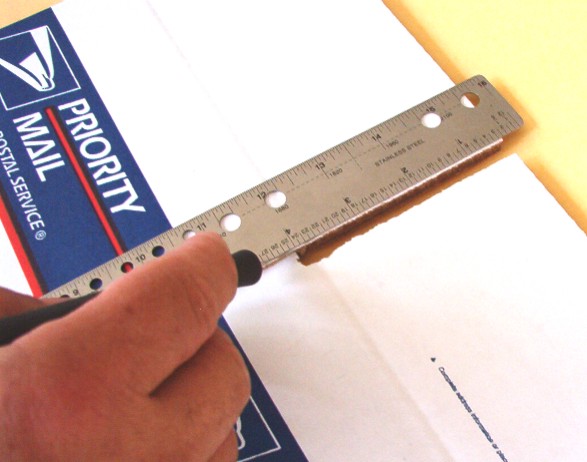
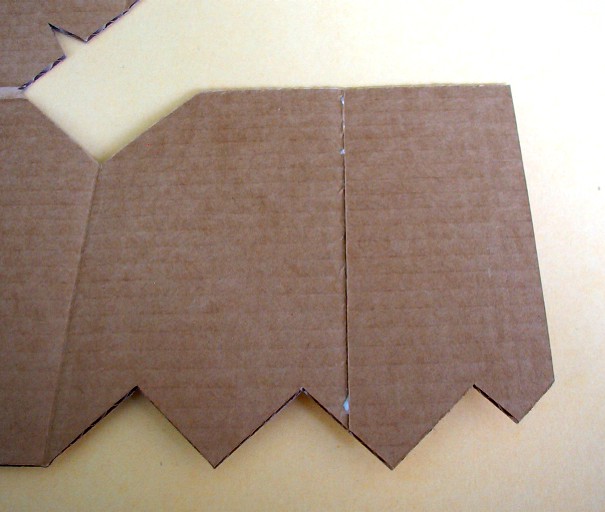
Cut out Side pattern. Line it up carefully on the
folds of
the lower right side panel and mark around the edge with a ball
point
pen.
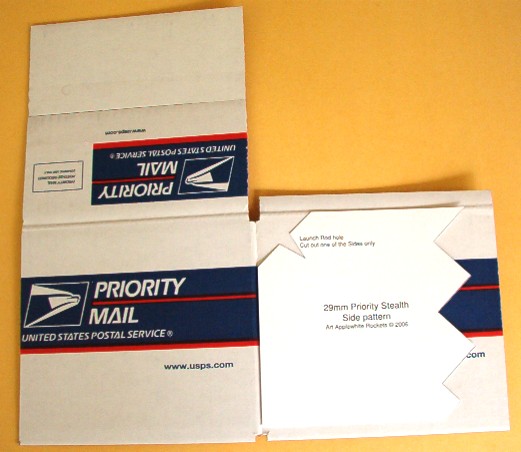
Mark the Launch
Rod
Hole only
on the lower right side panel. Repeat marking the other
side
panels. Be sure to rotate the pattern 90 degree
clockwise for the next panel. Go in the order of lower
right, lower left, upper left. Make allowance for the
slight
narrowness (about 1/8 inch) of the upper left side panel.
Extend
the lines from the lower right side panel onto the 1/2 inch
flap.
Cut on along the outside
lines with a ruler and a
sharp craft knife.
Run a fillet of glue on the inside of the tape seam on the upper
left
panel.
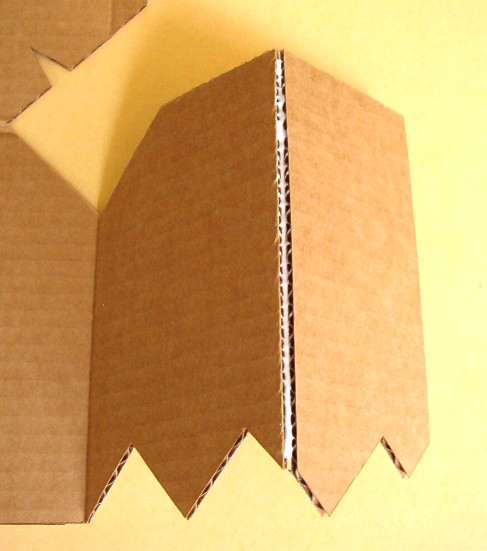
Lay the panel flat and let the glue dry. Do not
tape the inside of the seam.
Spread glue thinly and evenly on the 1/2 inch flap and form the
panels
into a partial box shape.
Make sure the 1/2 inch flap is flat against the inside.
Let the
glue dry throughly.
This completes
construction
of the Top.
Go to Page 2 of the instruction